I set up my personal website using GitHub Pages a little while back using Jekyll and a Hyde template that I thought was pretty nice. However, after listening to Yihui’s RStudio webinar on using blogdown, I decided maybe it was time to give blogdown a try and switch from Jekyll to Hugo. I spent a good couple weeks off and on reading up on Hugo, exploring different Hugo themes, and building test websites and locally before finally feeling comfortable enough to take the plunge and make the switch. This post recounts the basic process I used to switch.
Setting Up Tools for the Hugo / Blogdown Approach
First off, there are numerous helpful posts on using blogdown and getting set up with Hugo - such as here, here, here and here. We’ll need to have devtools, blogdown, and Hugo installed. On my system, this was a matter of:
if (!requireNamespace("devtools")) install.packages("devtools")
devtools::install_github("rstudio/blogdown")
blogdown::install_hugo()
OK, assuming you have git installed, you’ve got the tools you need. At this point, I created, played with, and deleted numerous Hugo themed local webpages just to get a feel for how Hugo worked, what the different themes looked like and how they were structured, and how to manipulate them. First, peruse the Hugo themes. Next, either simply create new empty directories to create themes or generate new R projects and directories to create themes. Once you have an empty directory / R Project, and in R have your working directory set to that directory, simply create themes like:
blogdown::new_site(theme = "gcushen/hugo-academic")
blogdown::new_site(theme = "kakawait/hugo-tranquilpeak-theme")
blogdown::new_site(theme = "halogenica/beautifulhugo")
You’ll get several directories in the directory you chose for your project which will look like:
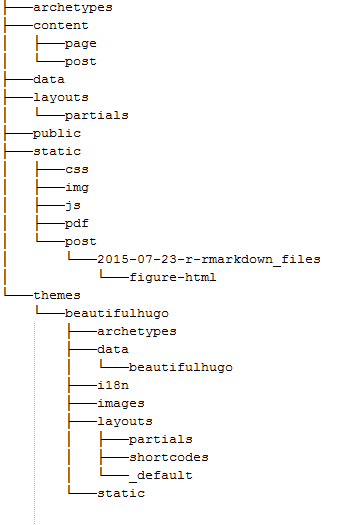
The theme you choose will likely come with an example site as well. What you’ll want to do is begin modifying and adding elements under ‘content’, and you can play with elements in layouts as well to get customs footers and / or headers. You’ll want to spend some time understanding config.toml - this is where you primarily customize your site. You’ll change things like your logo picture by putting a new logo.png file in static/images/logo.png. The public folder is where all the webpage contect gets generated when you use blogdown to build or serve site (using files in content / static / layouts along with config file).
Going Live
I followed very closely the steps here which worked for me, but you may want to explore a bit depending on your configuration. The way I chose to do things was to make a backup of my Jekyll GitHub Pages website, get a working local repository of the new Hugo GitHub Pages I wanted to use, and then when I felt I was ready, rather than modifying my Jekyll pages content, I completely blew it away on GitHub (this may not be approach you want - my site was not that old and I didn’t care about keeping commit history) in order to re-create from scratch. Here are the steps I followed:
After blowing away my old GitHub Pages repo on GitHub, on my GitHub home page I created a new repository. My GitHub pages repo had been mhweber.github.io, and this is exactly what I made the new repository I recreated. Create the repository and clone locally. I created a new R Project that cloned this new repository myself.
Create the folder with a “README.md” so it’s ready to go. However, once you clone, you need to delete the README.md and push back up to GitHub like so after physically deleting the README.md file:
git add .
cit commit -m 'delete README.md'
git push -u origin master
Now either open the Hugo RStudio project you’ve created and are ready to use, or go to the Hugo directory if you didn’t set up as an RStudio project.
THIS PART IS THE KEY!
The way it all hangs together (as I did it) with Hugo is using git submodules - essentially, the repo you use is making use of a folder from another repo - so mhweber.github.io is going to use the public folder in my Hugo project/directory (where all the web page content gets generated). From your Hugo project / directory, you use:
git submodule add -b master https://github.com/mhweber/mhweber.github.io.git public
This gets us ready to roll. Make any old change / add a post to your Hugo repository and then using blogdown serve site:
blogdown:::serve_site()
This updates everything in the public folder. You can then add, commit and push your Hugo repository (assuming it’s linked to GitHub). The crucial other step is you then need to cd into the public directory and add, commit and push to get content pushed up to your webpage (i.e. to mhweber.github.io):
cd public
git add -A
git commit -m 'Time to go live with new page'
git push origin master
And that’s it!